Installation
This page walks you through how to install the Scheduleright package.
-
Install Libshare
Libshare is an open source utility package from Datasert which provides many reusable components. Scheduleright uses that package to build its functionality.
Install the package from appexchange
-
Obtain the Scheduleright package url
We are working on having this package published in Appexchange. Meanwhile, contact us for package url. Please reach out to support@datasert.com.
-
Install Package
Install the package from given package url and follow the instructions here. Typically, this package is installed for
Admins Only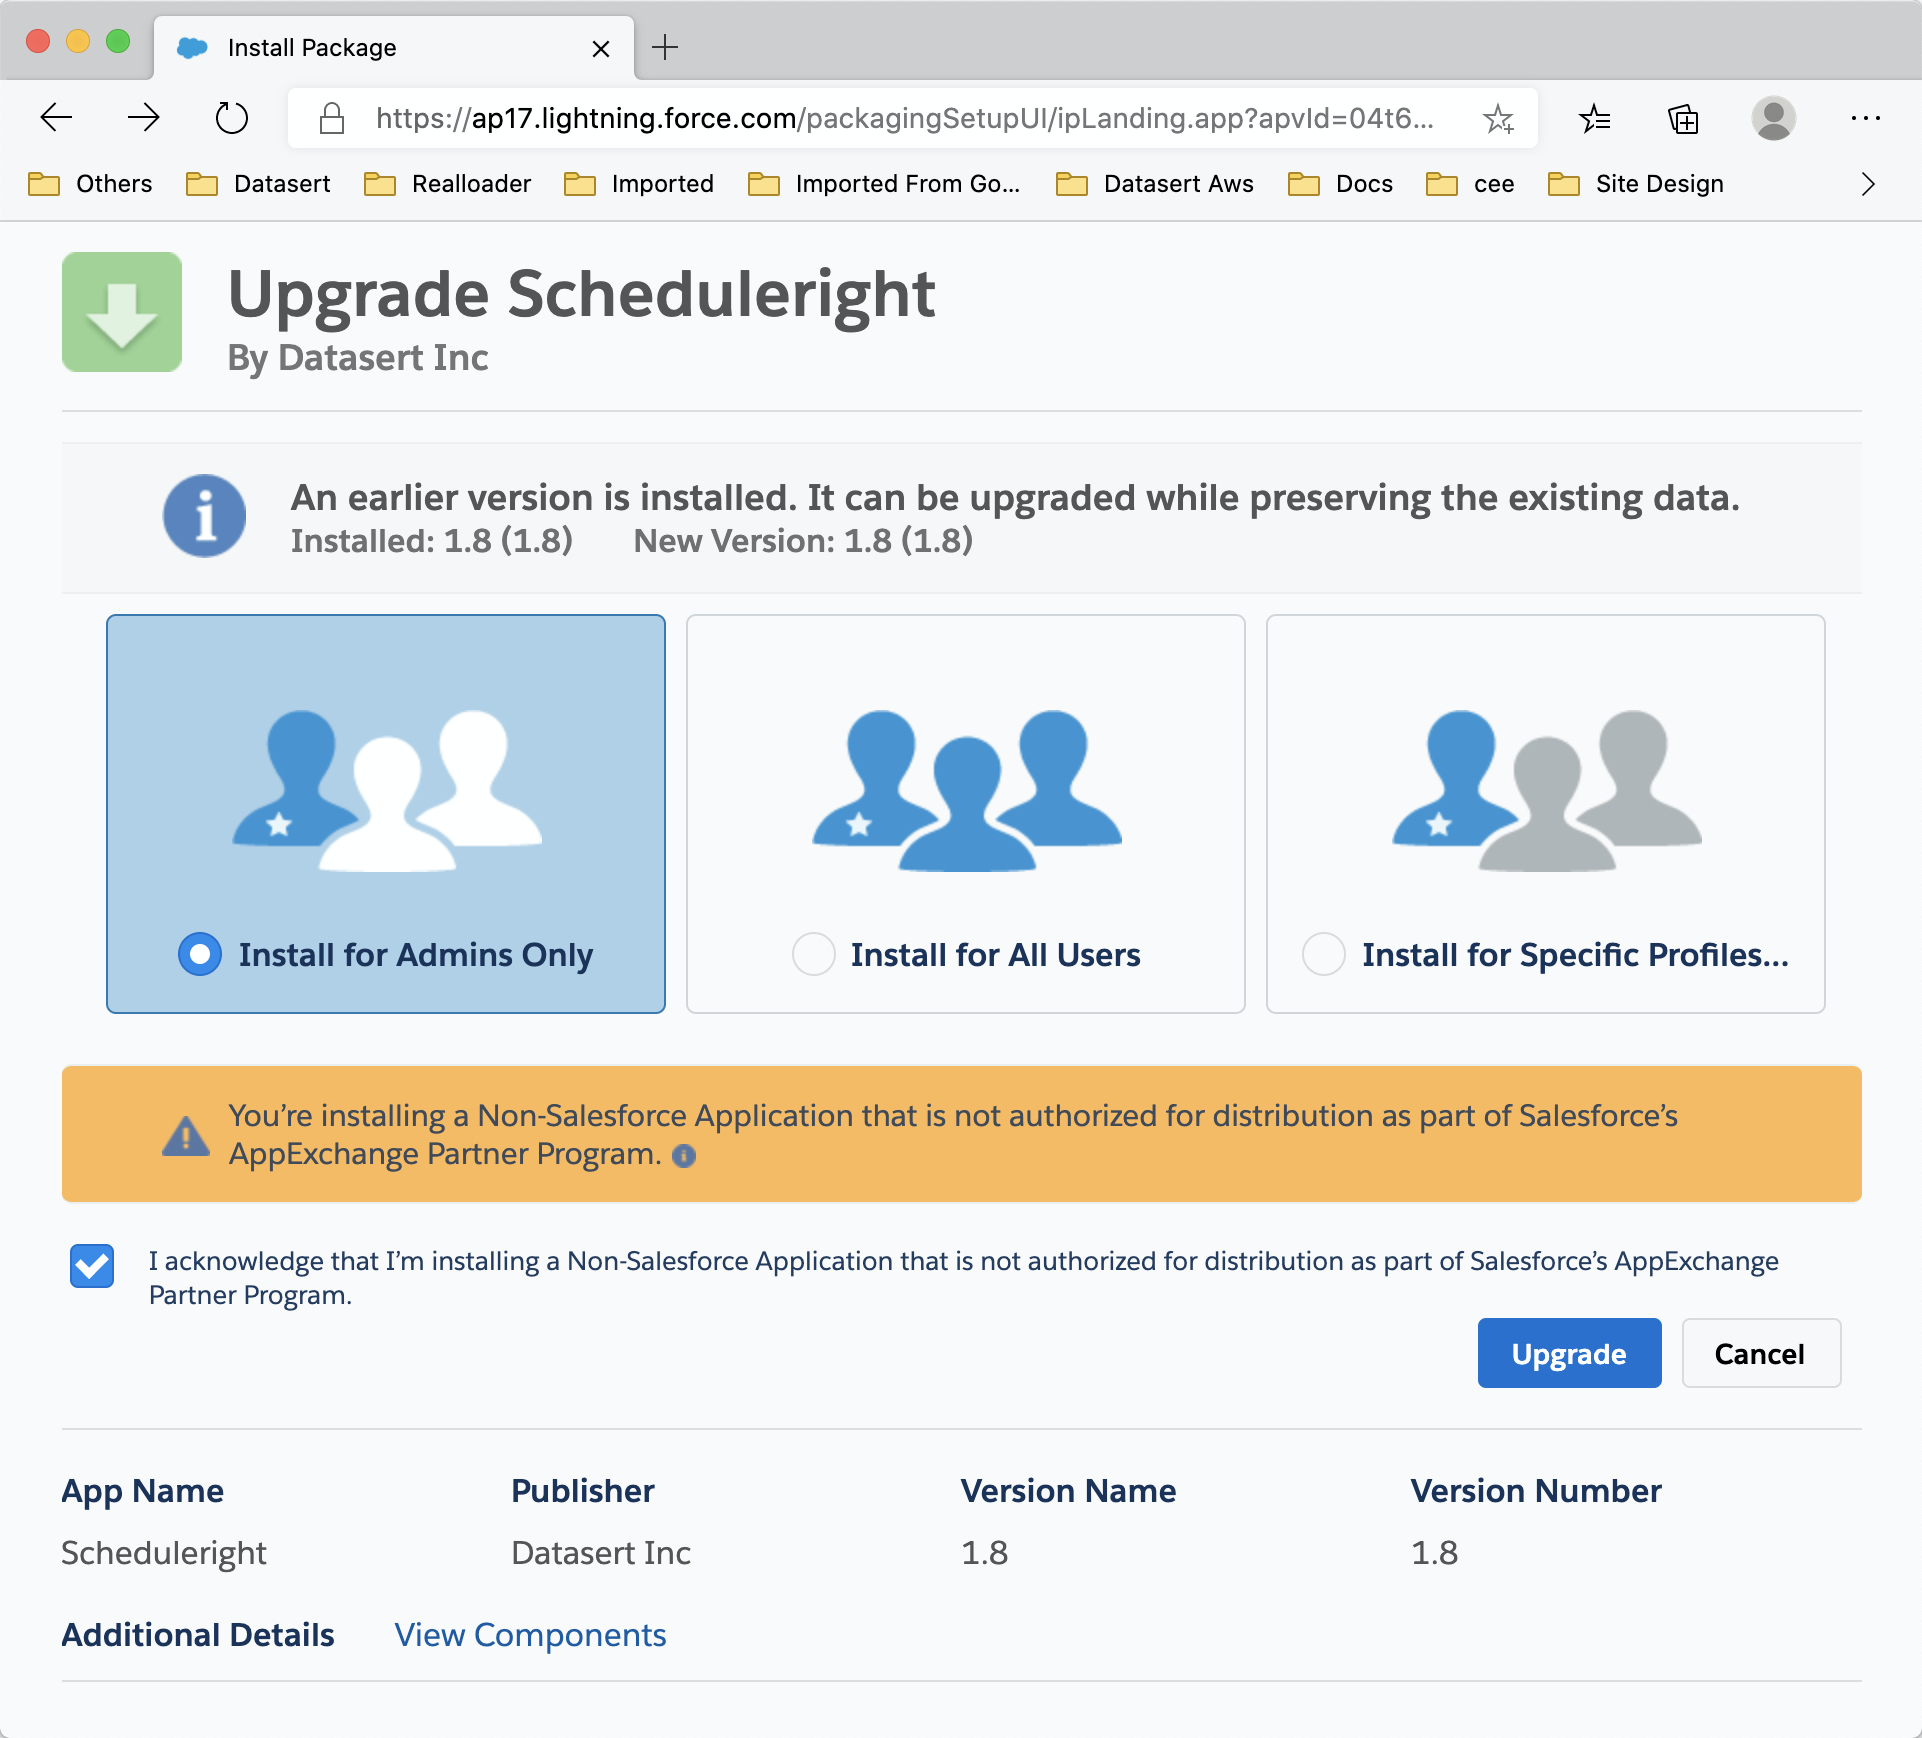
-
Create delegation classes
Schedulright is a managed package (with namespace
dsr) and hence it cannot directly access the classes defined in your org (unless they areglobal).For Scheduleright to be able to access your classes to invoke them, you need to create a delegation class in the org. Code consists of one main class and another corresponding test class.
If you are installing Scheduleright in production org, you will need to deploy these two classes from your sandbox.
/**
 * Global implementation of Scheduleright interface, used to create instances of classes
 * as and when required it to be scheudled.
 */
global class SchedulerInstanceCreatorImpl implements dsr.SchedulerInstanceCreator {
    global Object createInstance(dsr.SchedulerInstanceCreatorRequest req) {
        return Type.forName(req.className).newInstance();
    }
}
@IsTest
public class SchedulerInstanceCreatorImplTest {
testmethod public static void test_createInstance() {
dsr.SchedulerInstanceCreatorRequest req = new dsr.SchedulerInstanceCreatorRequest();
req.className = 'SchedulerInstanceCreatorImpl';
System.assertNotEquals(null, new SchedulerInstanceCreatorImpl().createInstance(req));
}
} -
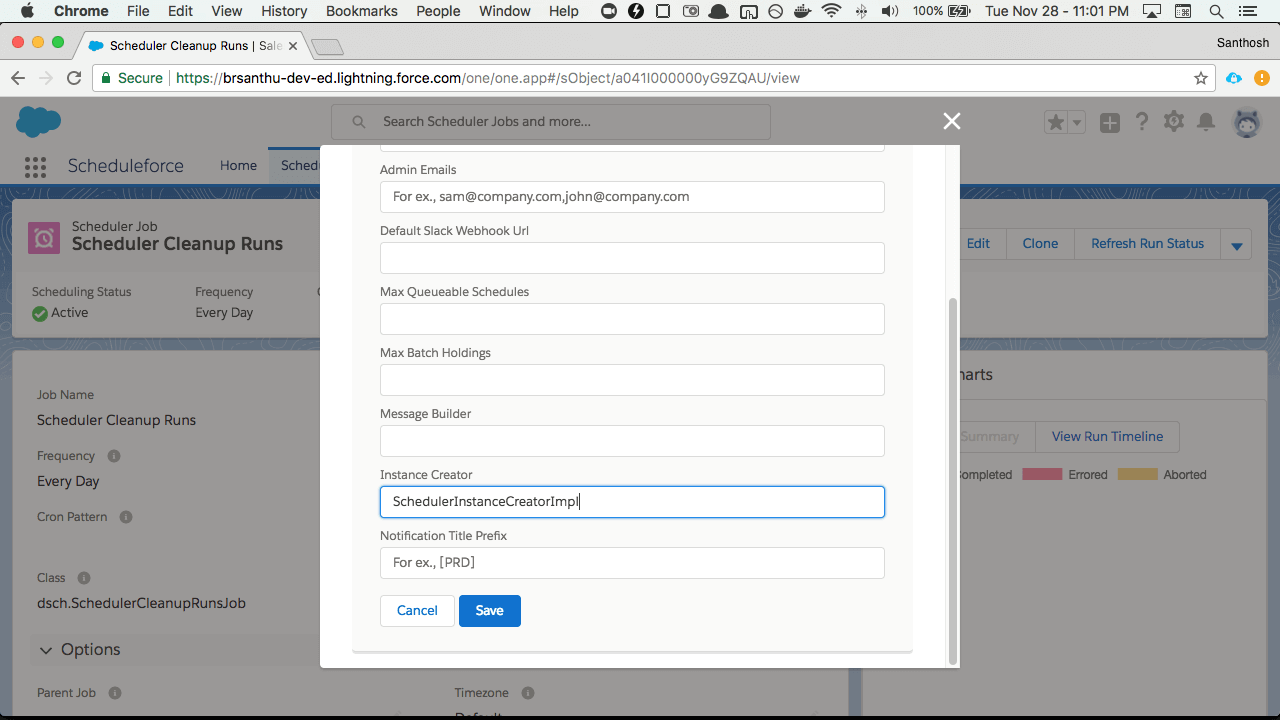
Configure the app
Installation would have created an app
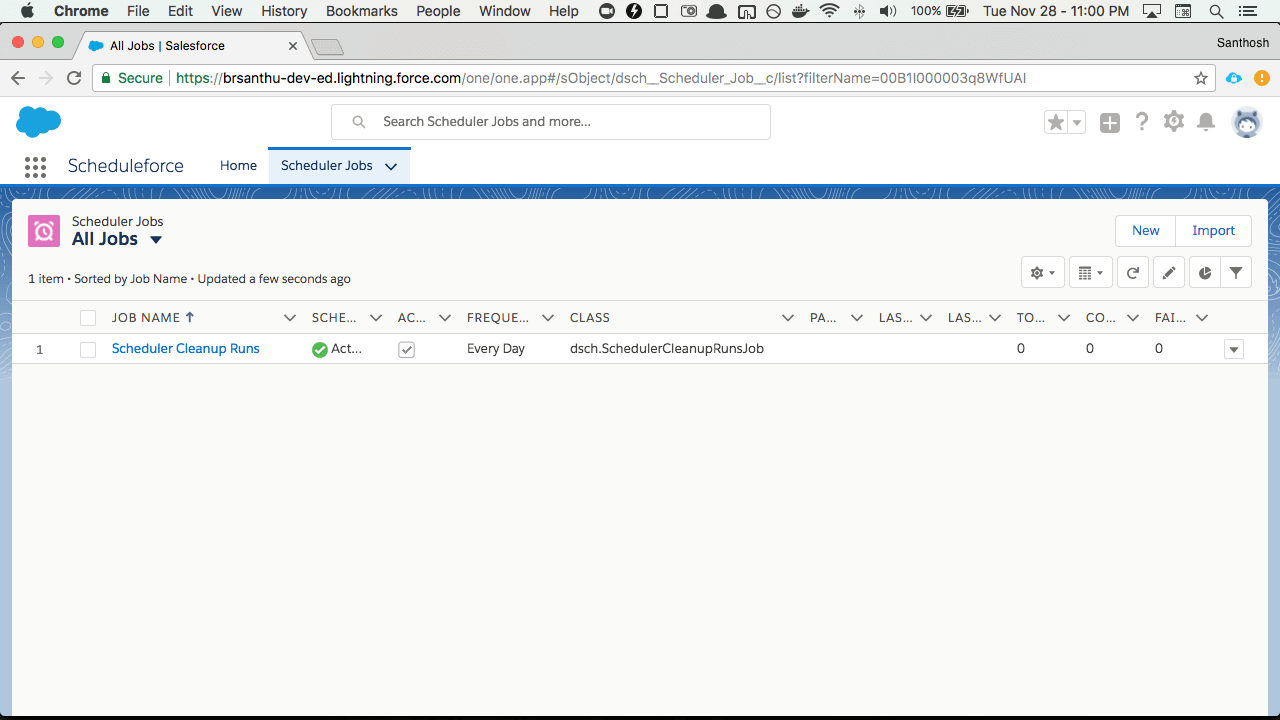
Scheduleright. Access the app from Lightning app switcher.a. Installation should have created a first job, which is used to clean up the runs after configured number of days (defaults to 180)
b. Click on the
Edit Global Settingsto access the Scheduler Global Settings and specify the valueSchedulerInstanceCreatorImplfor Instance creator setting.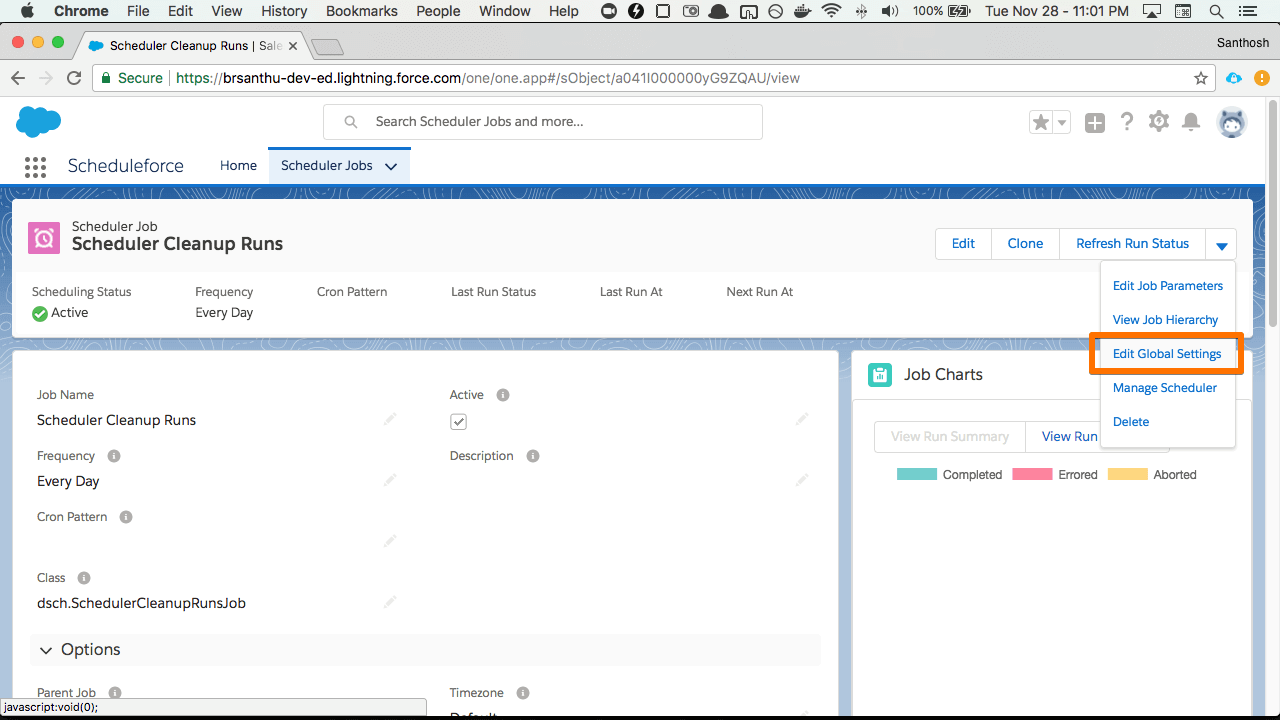
-
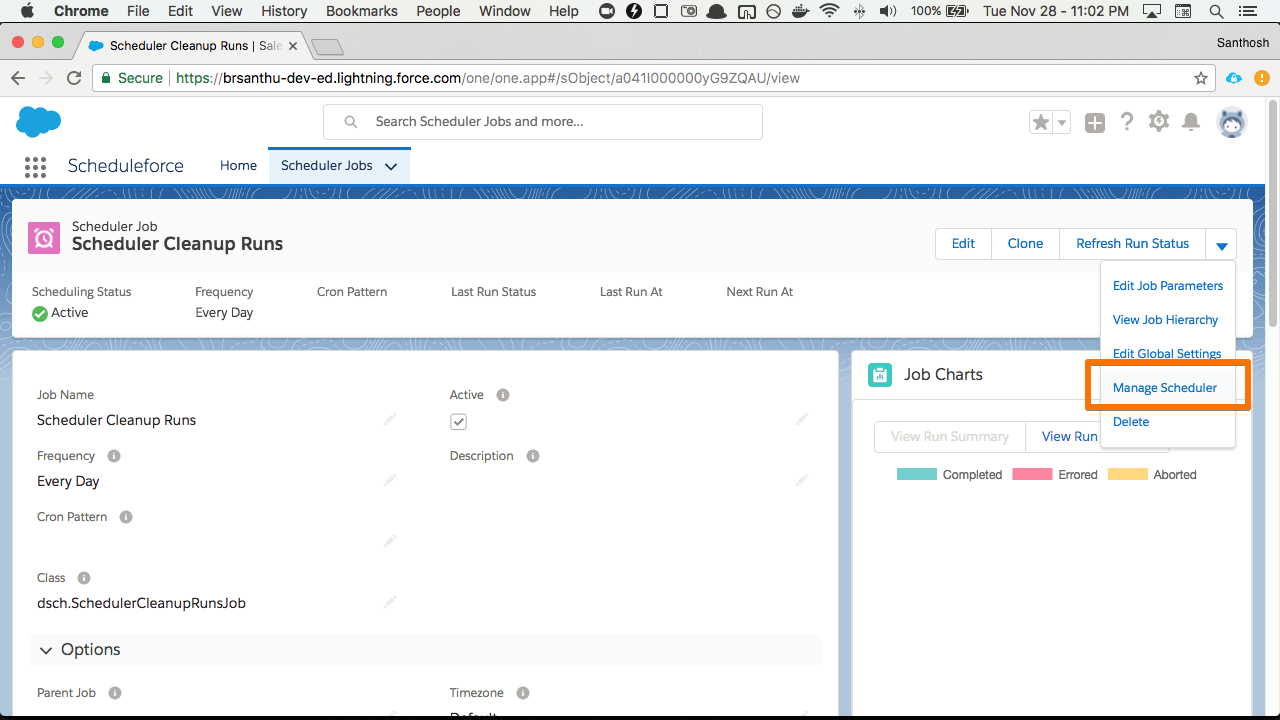
Enable Schedules
Scheduleright uses Salesforce Scheduled Jobs feature to start the scheduler to schedule the Jobs you would have set up.
App creates 60 Scheduled Jobs, to run every minute. Note that if your org has already uses 40 or more jobs, then some Scheduled Jobs creation will not be successful. If that happens, delete some Scheduled Apex jobs, and follow this step again. With Scheduleright installed, you do not need to schedule any more classes directly.
a. Click on Manage Scheduler from menu
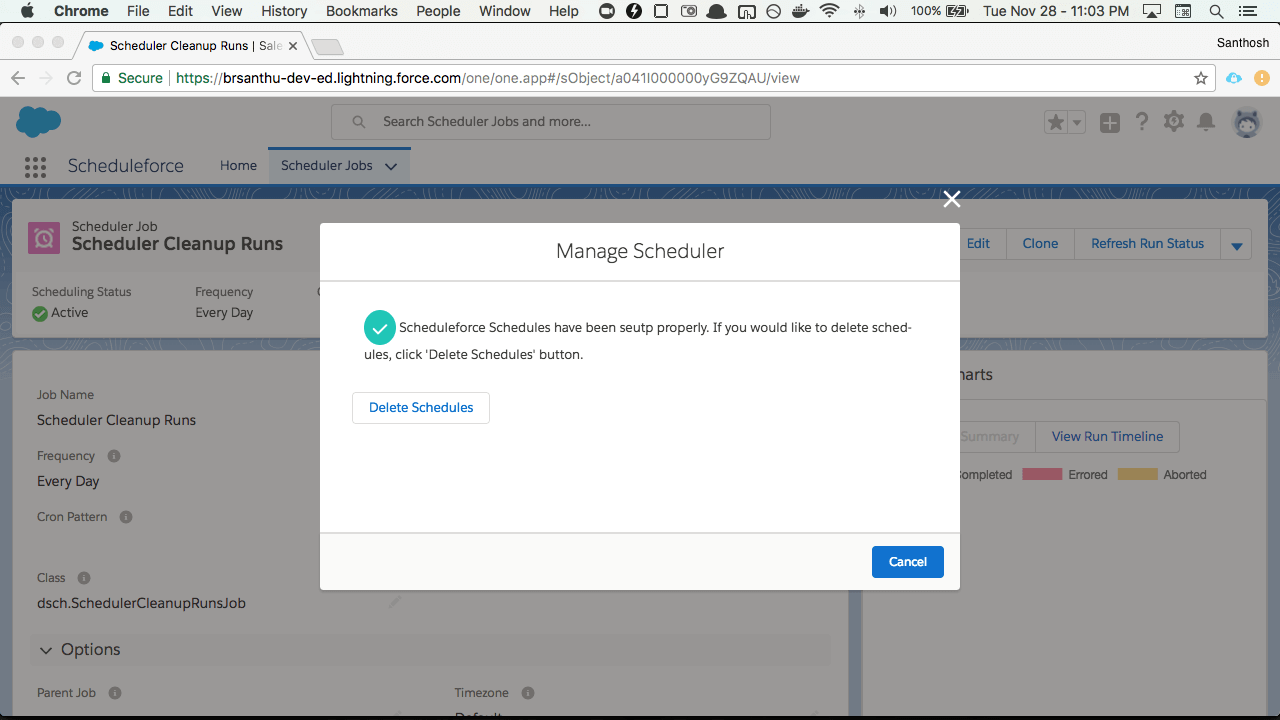
b. By default, it shows that the Schedules are not setup.
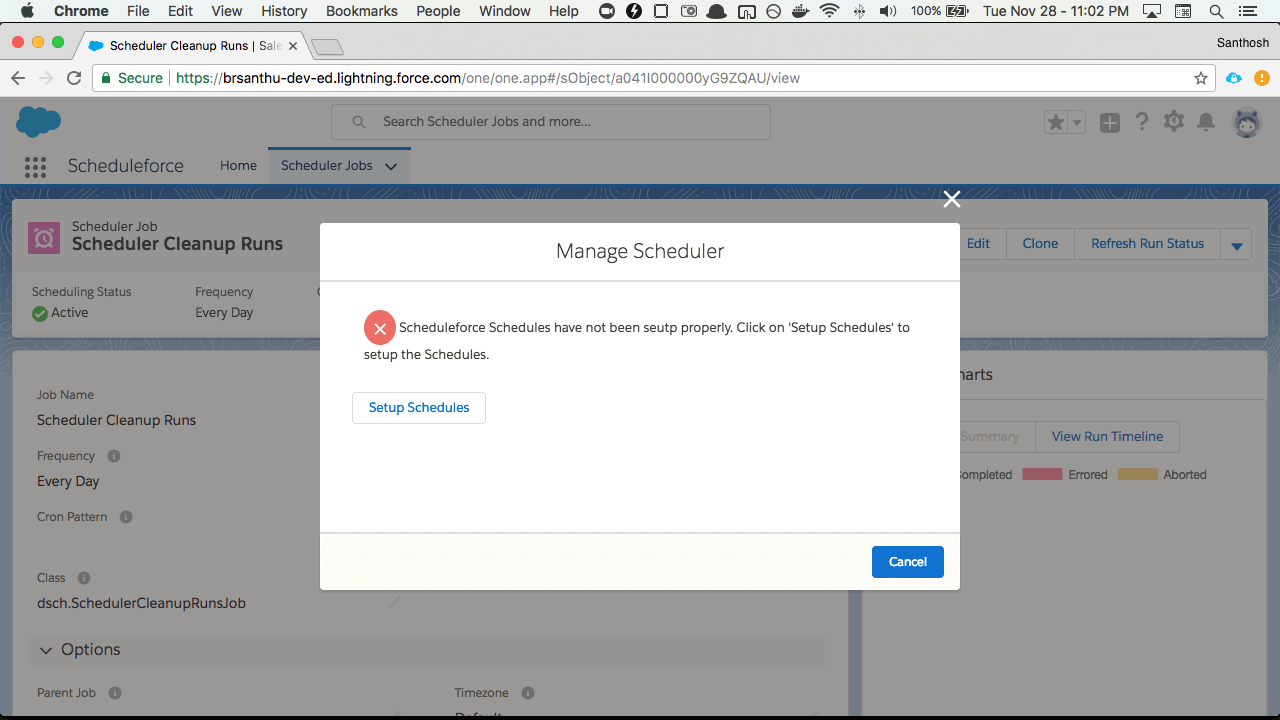
c. Click on
Setup SchedulesIt should show confirmation page with status indicating Schdeules have been setup. Now Scheduleright is ready to schedule jobs.
-
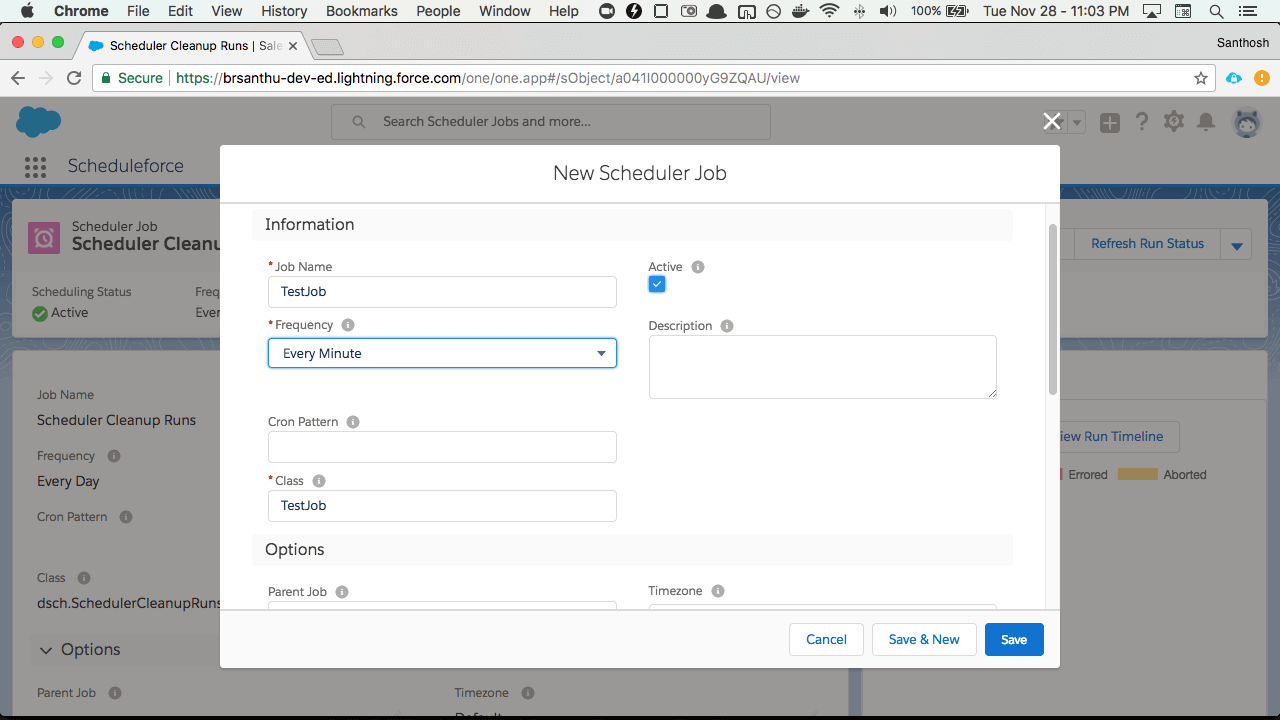
Add your Jobs
Now that Scheduleright is installed and configured, it is time to add your scheduled jobs.
a. Click on New Scheduled Job
b. Configure the Job settings. Note that you need to use the class appropriate for your org.
-
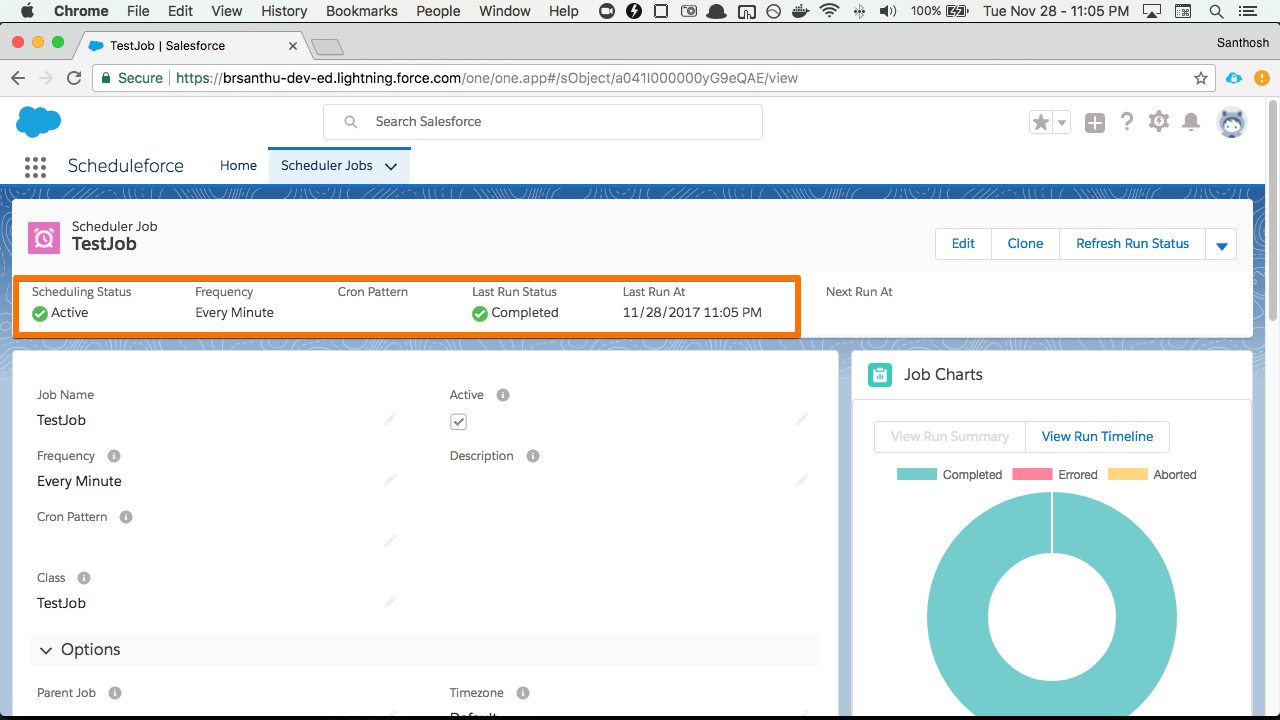
Ensure Jobs are running
If you wait for a while, the status should be shown when you access the Job page.