Logins
The Logins module allows you to store one or more SFDC connection credentials and then log in to Salesforce with a click in various target locations (like same tab, new tab, etc.).
Add Connection
To add a connection, click on the Add Connection button which is shown when there are no Connections added or the Plus icon in
the Connections tab toolbar. It should bring you to the dialog below. Enter the details and click Save. See the table
below for details of each field.
By design, the Popup that is shown when you click on the Brobench icon is dismissed when you click on other tabs or focus out. So to add a connection, we recommend you first go to Full page mode and then add a connection.

| Field | Type | Description |
|---|---|---|
| Name | String (50)* | This is the name of the Connection. It must be unique. This is shown in the Logins list of Connections so keep it short and well representative of the Org. For example, uat or prdnew |
| Group | Picklist (50) | Group this Connection belongs to. All existing Groups are shown there. If this is the first Connection being added or you want to specify new Group, just enter the group name. If you leave it blank, connection will be shown under <blank> group name |
| Org Type | Picklist | Type of Salesforce Org of Connection. Select the one from Picklist. It defaults to Sandbox as that is most used value. |
| Alias | String (25) | Not used as of now so you can leave it blank |
| Username | String (100)* | Salesforce Username |
| Password | String (100)* | Salesforce Password |
| Token | String (100) | Salesforce Secret Token |
| Color | Connection color. This is used to color the border of a Connection when shown in the Logins tab and also to highlight other parts of the app | |
| Landing Page | Url | The default landing page after logging into the Org. You can select one of the pre-defined values or you can enter custom path. If you enter custom path, it must start with / |
| Notes | String (4000) | Any note you want to add to this connection. This is not used by the app for anything but purely for users' use |
Edit Connection
To edit a connection, click on the Pencil icon in the Connections Actions.
Delete Connection
To delete a connection, click on the Trash icon in the Connection Actions. It will prompt you to confirm the deletion and after that it will delete the connection.
List Connections
Once you add all your connections, when you click on the Logins tab, it shows the list of Connections grouped by their corresponding Group name. Groups are sorted alphabetically, so if you want, you can rename a group to add a number to order them. For example, 1 for Dev, 2 for Stage and 3 for Prod.

Connection Actions
Each Connection is shown as a box with border color you associated with Connection. When you hover over a Connection, additional actions are shown. Hover over each of the icons and hold for a few seconds, and a tooltip is shown with brief action description
 vs
vs 
Here are various actions in the Connection.

| Action | Description |
|---|---|
| 1 | Initiates Login in new tab |
| 2 | Initiates Login in current tab |
| 3 | Initiates Login in new tab |
| 4 | Initiates Login in new window |
| 5 | Initiates Login in incognito window |
| 6 | Favorites or Unfavorites a Connection |
| 7 | Open More Actions Menu |
When you click on More Actions menu item (vertical ellipses icon), a menu is shown.

Group and Actions
Connections are shown under the group it is associated with. When you hover over the group, it is highlighted and additional actions are shown. Click on Pencil icon to edit and Trash icon to Delete the group.
When you delete a Group, all if its connections are also deleted. If you want to retain any of the Connections, first edit each connection to assign a new Group and then delete the old Group

Searching
You can filter one or more Connections by entering search term in the Search input box. It searches in the Name, Username and Group name to search. Search algorithm is the same as used throughout the app. See Searching section for more info. Click on the Clear icon in the Search Input box or manually clear the search term to show all Connections again.

Favorites
You can Favorite any of the connections. Click on empty Star icon on Connection Actions. To unfavorite it, click on the filled Star icon

Logging In
To Log in to an Org you can click on the name of the Connection or one of the Hover actions. Depending on where you click, the target where it is going to open the URL changes. See Connection Actions for details.
Once you click the action, it opens the URL in target location and logs you in. During the login process, the following message is shown in the Sfdc Login page.

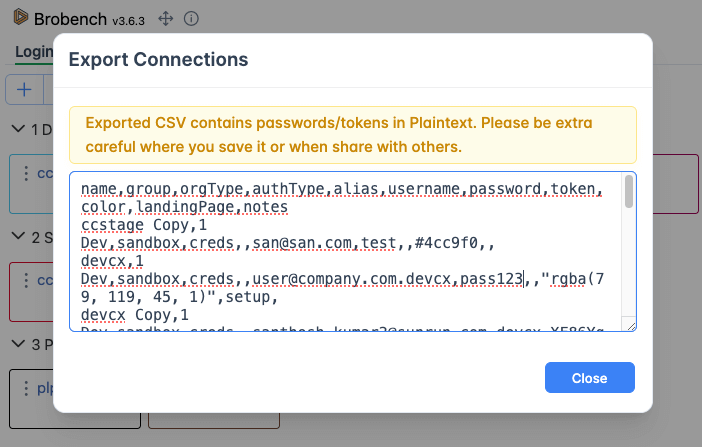
Export Connections
To export connections, click on the Export icon

App should show dialog with Connections exported in csv format. Copy the contents and do what you need to do next.
Connections are exported with password/tokens in plaintext for easy sharing and backup. So please be careful about it and safeguard it as appropriate to your company policy.
Import Connections
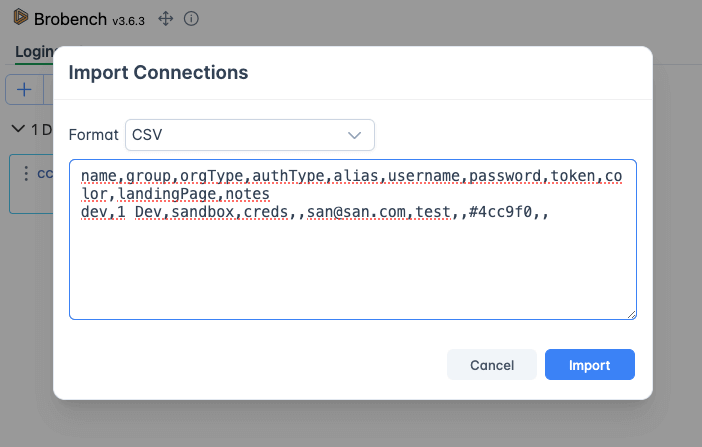
To import, click on the Import icon.

Brobench Login Connection UI is designed to have short connection names so we can show many connections in a single line or page. If you are importing with long names, it may show jumbled characters. If so, rename the connection name either before importing or after importing.
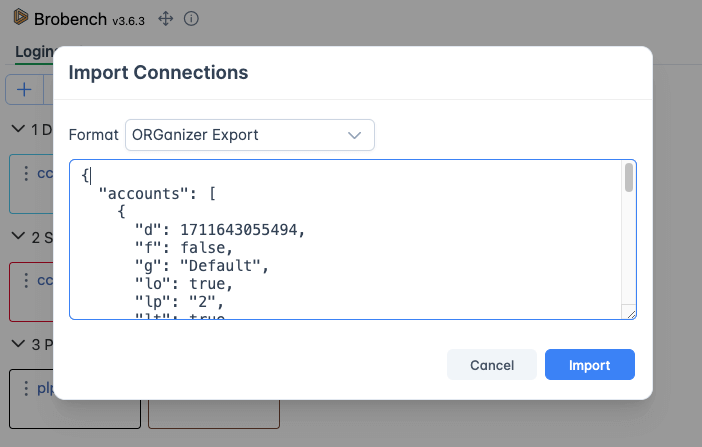
The app should show the dialog below. Select the format (CSV or ORGanizer) and enter the content in that format. Then click Import.
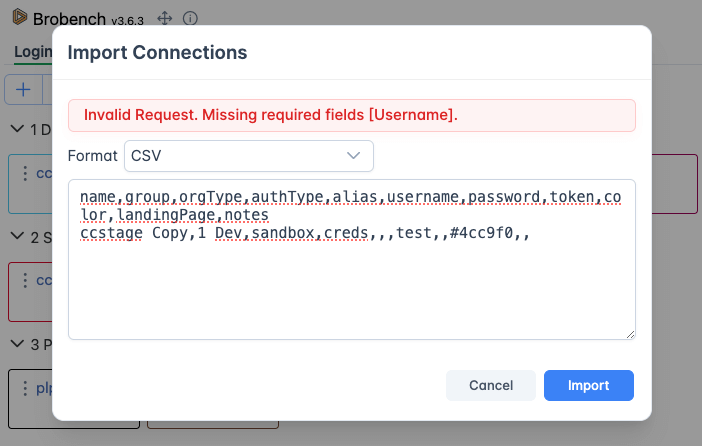
If successful, the app would show how many connections are imported. If connection name matches with any existing
Connections, then Copy is suffixed to make them unique. If there are any errors due to validation or missing data, the
app would show an error message.
Import ORGanizer Connections
ORGanizer is a Chrome extension that some may have used to log in to Salesforce. To export connections from there, follow these steps.
-
Log in to Salesforce UI. ORGanizer extension is shown as an icon at the bottom left of the screen (or other location as per its configuration)
-
Click on
ORGanizericon
-
Click on
Options
-
Click on
Import/Exportand click onExport Data (JSON)
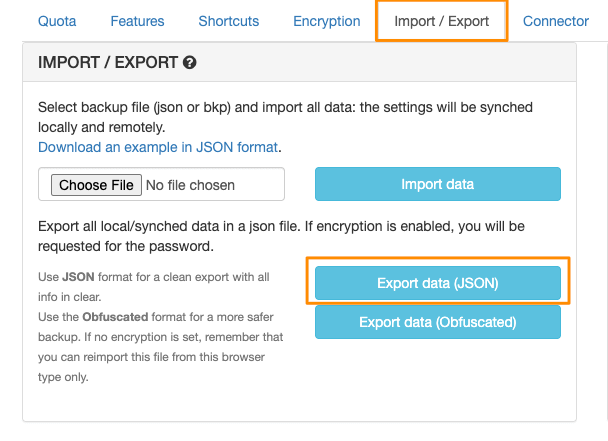
- Now paste that JSON content into the Brobench Import dialog and select the format as
ORGanizer Exportand clickImport