Edit Record
Record Editor can be opened from two different places.
-
From within the Sfdc Record page, clicking on the
Edit Recordicon on the Brobench control panel
-
From within the Brobench Record Viewer by clicking on the
Editbutton in the toolbar
In either case, app will show the below Record Editor dialog which lets you edit all fields of the record.
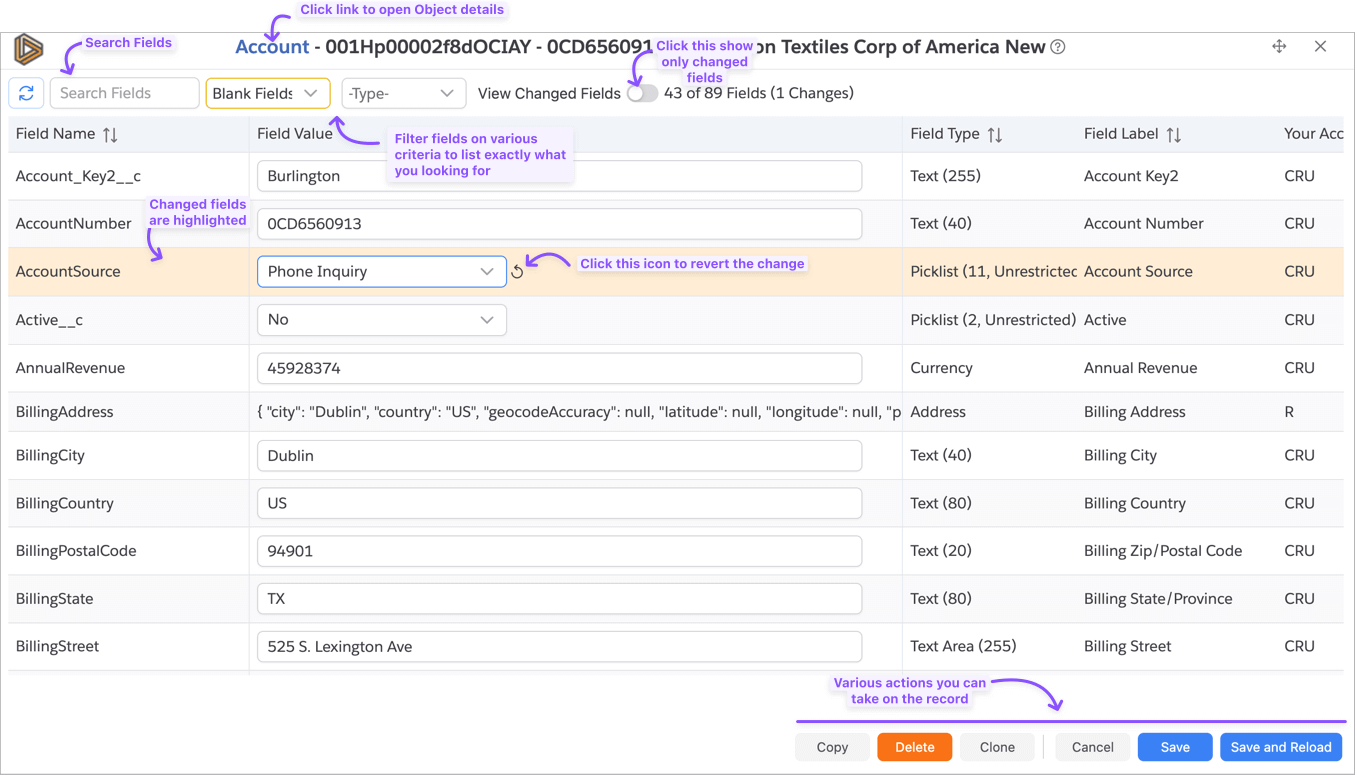
Filtering Fields
There are multiple ways to filter the fields in the Record Editor dialog.
-
Search: You can search for a field by typing in the search box at the top of the dialog. This will filter the fields based on the search term you entered. This will search Field Name, Field Label, and Field Value fields.
-
Hide Fields: You can hide fields that you do not want to see in the Record Editor dialog. To do this, click on the
Hide Fieldsdropdown and select the type of fields you want to hide. You can hideBlank/System/Formula Fields,Blank Fields,System Fields,Formula Fields,Default Values, andNull Fields. -
Type Filter: You can filter the fields based on their type. To do this, click on the
Type Filterdropdown and select the type of fields you want to see.
- When you make use of one or more of the above filters, the Record Editor dialog will show only those fields that match all the conditions.
- There is a preference to hide the
Blank Fieldsby default in the Record Editor. That can be a great way to minimize the number of fields shown in the Record Editor.
Opening Parent Records
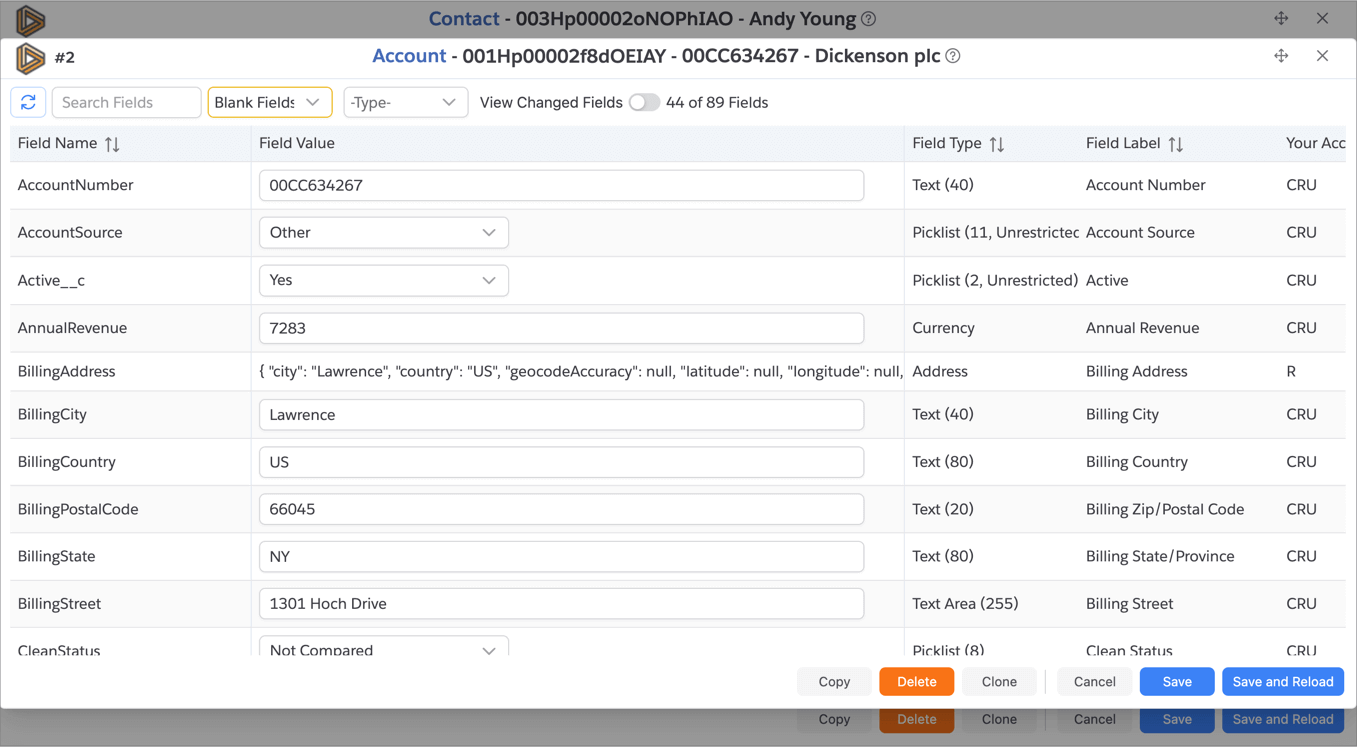
If the record has any references to other records, you can open those parent records in the Record Editor dialog by clicking on the Id link next to the field value.

This will open the parent record as a new Dialog on top of the current one. You can keep opening its parent records it
the same manner. To go back, just click Cancel and it will close the top most dialog and show the previous one.
Editing Fields
All editable fields in the Record are shown in the edit mode with appropriate input controls. Enter the new values for fields as appropriate.
As you make changes, changed fields will be highlighted with Revert icon shown next to field
value. Click on the Revert icon to revert the field value to its original value.
You can also show only changed fields by turning on the View Changed Fields toggle at the top of the dialog.
- Record Editor does not support Picklist Field dependencies, hence it will show all the values in the Picklist Field even if some of them are not available based on the other field values.
Once you are done with editing the fields, click on the Save button to save the changes. The App will save the record,
and if save is successful, the dialog will be closed.
Save and Reload button will save the record and if successful, it will reload the browser page. This button is not
available when you open the Record Editor from within the Brobench Record Viewer.
Select Parent Record
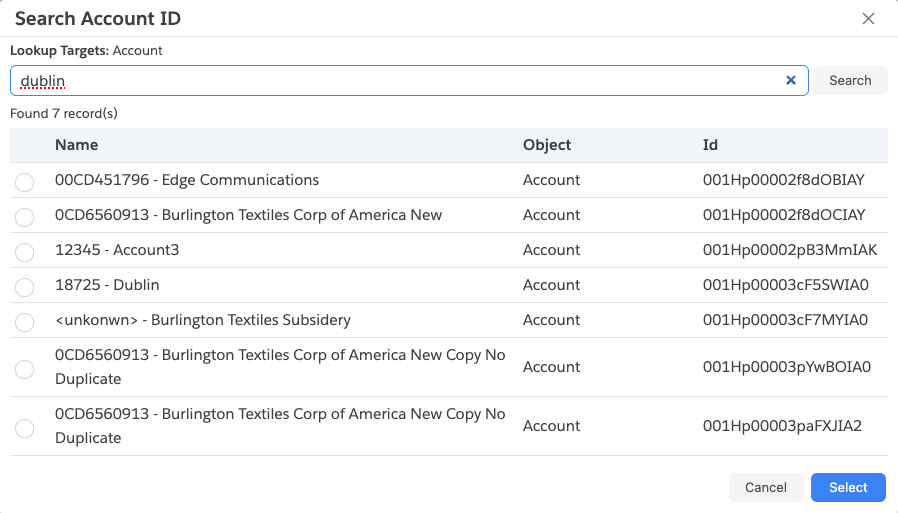
For any Lookup/Master Detail fields, click on the Search icon next to the field to open a search dialog.
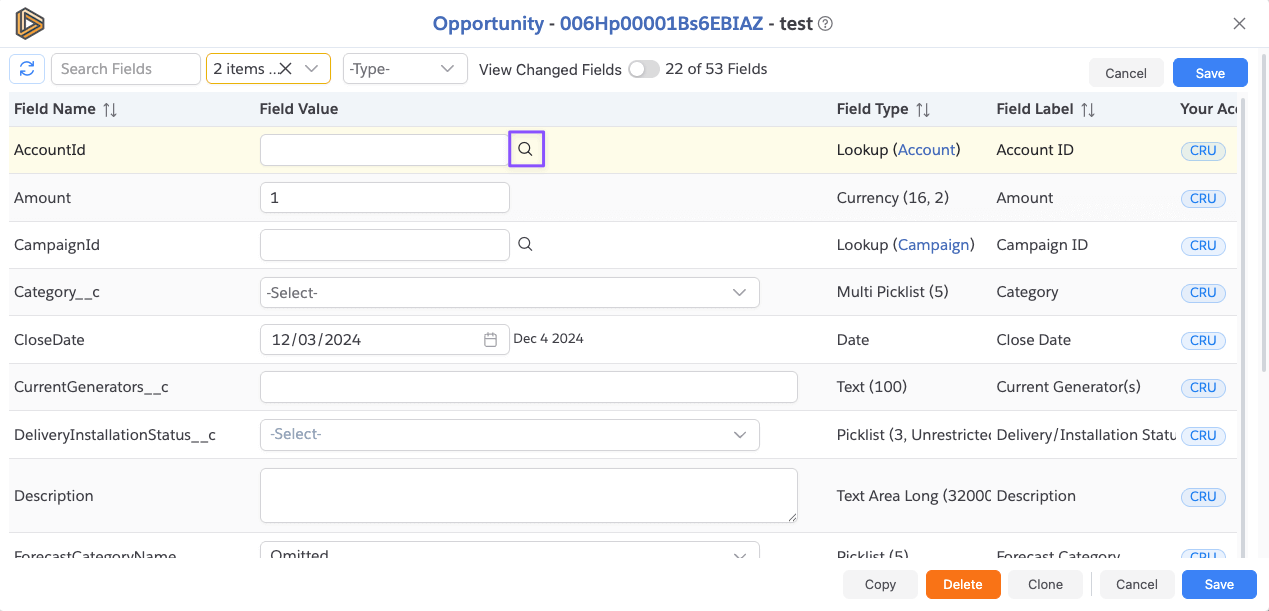
When click on it, it shows the below dialog. Enter the search term to show the results and select a record.
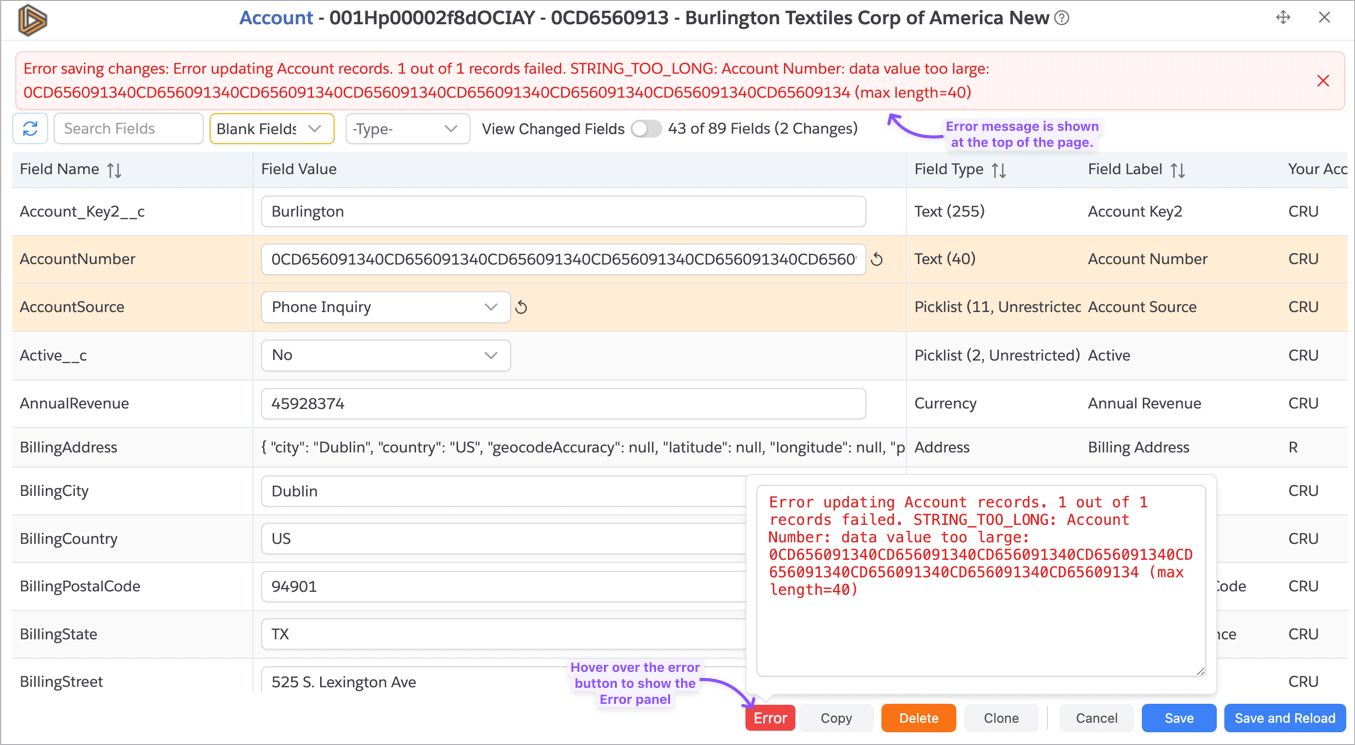
Handling Save Errors
If there are any errors while saving the record, the app will show an error message at the top of the dialog as well as
error marker at the bottom of the dialog. Verify the error, correct any issues and click on the Save button again.
Clone Record
To clone the current record, click on the Clone button. It will enter the Clone Mode. In the clone mode, fields
which are createable but may not be updateable are made editable.
- If you have access to set audit fields, then
CreatedDate,CreatedById,LastModifiedDate, andLastModifiedByIdfields will be editable in the Clone Mode. If you prefer to not copy those fields over, you can nullify the fields.
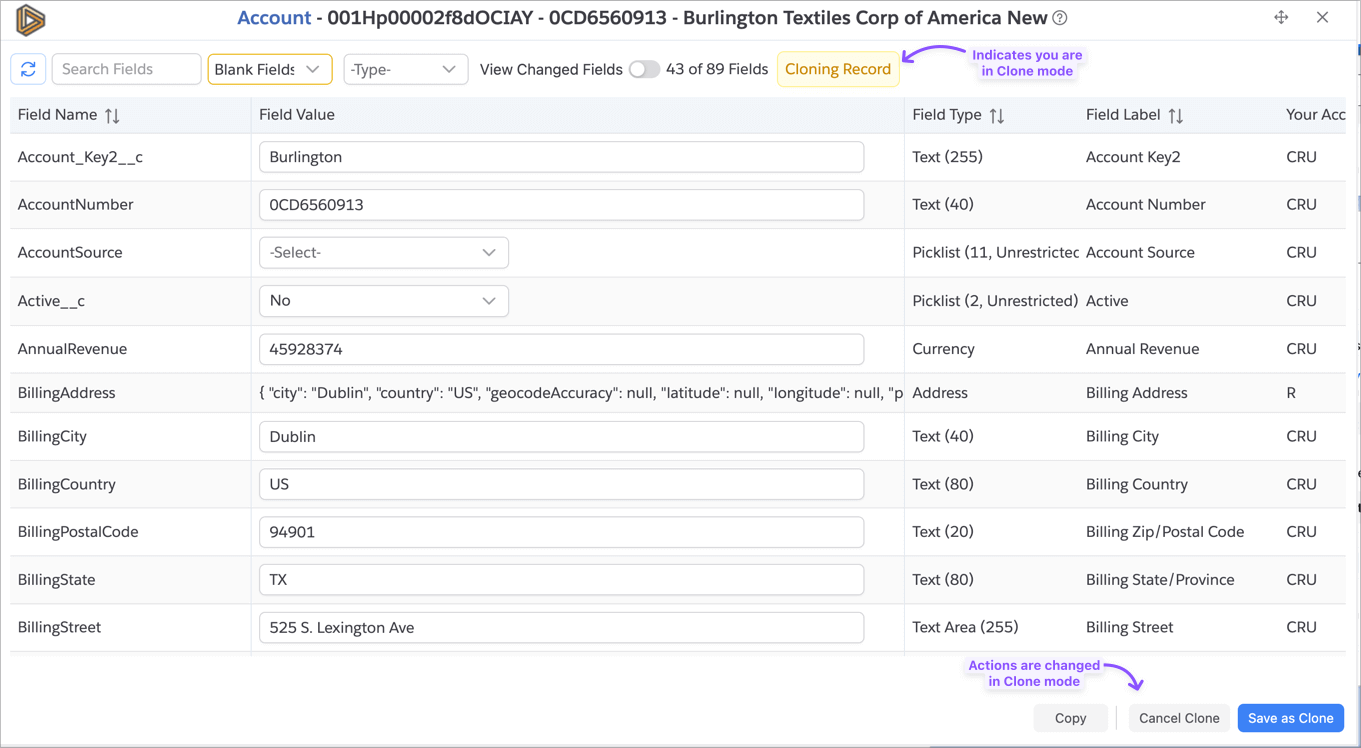
Once you are done with setting new values, click on the Save as Clone button to save the new record. If save is
successful, dialog will load the new record in edit mode.

Delete Record
To delete the record, click on the Delete button. It will show a prompt to confirm. If you confirm, it will delete the
record.
Copy Record
You can copy the current record to clipboard by clicking on the Copy button and selecting the format to copy as.
